This document is meant for developers who wish to install authentication via phone on their site.
Teddy API
Integration scheme
Our widget is placed on your page. Widget code is javascript code that loads an iframe from teddyid.com. This iframe is displayed on top of your site, so to the user the login process looks as if he did not leave your site. Dialogue with the user takes place in the iframe. In rare cases, when the user decides to log in through his username and password in Teddy, a new window will open in which the user enters his username and password, then this window is automatically closed.
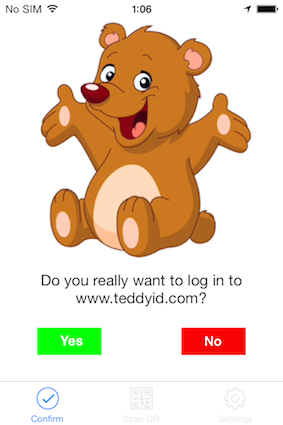
After successful authentication (ie if the user answers "yes" on the phone) javascript function onAuth() is called on your page. This function must be implemented by you. The function receives data about the performed authentication. You need to pass this data on to your server, and further from your server send it to Teddy verification service to verify the data, get user’s ID in Teddy, and optionally to receive user ID in your system.
Before you begin
For integration, you must first have an account at teddyid.com. If you don’t, please log in once and it will be created.
In all communications with Teddy your server must identify itself by its node ID (node_id). Each site or set of sites must have its own node_id. To create a node, log in to your personal account on teddyid.com, go to "Nodes" and create a "desktop application".
Mutual authentication of nodes (Teddy server is also one of the nodes) is performed using callbacks, as described in a separate document. If your site is written in PHP, it is recommended to use our library, which already implements all the methods you may need when communicating with Teddy while performing user authentication.
When you create a "desktop application" provide the same secret key, which you have set on your server.
Widget code
To enable users to log in to your site via confirmation on their phones, place the following javascript code on the page where you would otherwise ask a login and password.
var TeddyIDProperties = new function(){
	this.node_id = ;
	this.local_easyxdm_file = '/auth/easyxdm_name.html';
	this.onAuth = function(auth_token_id, auth_token, url){

	};
};

(function() {
	var async_js = document.createElement('script');
	async_js.type = 'text/javascript';
	async_js.async = true;
	async_js.src = "https://www.teddyid.com/js/auth.js";
	async_js.onload = async_js.onreadystatechange = function(){
		async_js.onload = async_js.onreadystatechange = null;
		TeddyID.displayAuthIframe();
	};
	var s = document.getElementsByTagName('script')[0];
	s.parentNode.insertBefore(async_js, s);
})();
In this code, you should substitute your node_id, which you received after creating "desktop application" and implement the function onAuth(). This function is called after a successful user authentication, and it takes three parameters:
| auth_token_id | The numeric ID of the authentication |
| auth_token | Token that you will use to verify login |
| url | URL of the page the widget was loaded from |
In onAuth() you usually want to send the data to your server by submitting a form, redirect, or ajax request.
If you want to customize the widget's appearance start from file https://www.teddyid.com/js/auth.js, change its styles and layout, save the new js on your server and specify the path to it in the line async_js.src = "https://www.teddyid.com/js/auth.js". Please keep in mind that the widget can change its height in a wide range (eg, new users will see first QR-code, and known users see a short form to select the account under which they are going to log in), it is recommended to display it over your site as a popup. Also, in order to increase awareness of the widget to users who can meet it at different sites, it is recommended not to deviate too much from the default appearance.
For compatibility with older browsers please place on your server the file easyxdm_name.html, its content is identical to https://www.teddyid.com/easyxdm_name.html, and link to this file in the code of the widget, as in the example above.
Verification of the user
Having received auth_token_id, auth_token and url from the page of your site, your server must verify the data and get user ID before granting access to the user. To do that, send POST request to the URL https://www.teddyid.com/confirm_auth.php and pass the following parameters:
| node_id | Your node |
| token |
Token for authenticating your server to Teddy (see the description of
authentication using callbacks). Calculated as follows: sha1("from="+node_id+";to="+to_node_id+";"+secret_key), where to_node_id=1 is ID of node the request is sent to. |
| auth_token_id | ID of the authentication received in onAuth() |
| auth_token | Token received by function onAuth() |
| url | URL of the page the widget was loaded from |
| ip | IP address of the user. Teddy checks that it matches the address from which he opened the widget |
The server's response is a JSON object. The values depend on the result of processing.
In the case of successful processing the server's response is a JSON object with the following fields:
| authenticated | Authentication result: 1 if successful, 0 otherwise. |
| employee_id | ID of the authenticated user in Teddy |
| login | User’s login in Teddyid.com. The field is present only when authenticated = 1. |
| authentication_error | Description reasons for authentication failure. The field is present only when authenticated = 0. |
| remote_id | User ID in your system (if Teddy knows it). The field may be present only if authenticated = 1. |
Example of response:
{
	authenticated: 1
}
In case of an error the server's response is a JSON object with the following fields:
| error | Error description |
Example error response:
{
	error: “some params missing”
}
If you are using our PHP library then instead of programming the requests, simply call AuthConfirmation::confirm() as in the example below:
$objAuthConfirmationResponse = AuthConfirmation::confirm(
		$_POST['auth_token_id'], $_POST['auth_token'], $_POST['url'], $_SERVER['REMOTE_ADDR']);
if (!@$objAuthConfirmationResponse->authenticated)
	die("not authenticated");
If you received authenticated = 1 in the response, that means that the user was actually authenticated to your site with the token. Having received this response, you will probably want to open authenticated session for the user and redirect him to a page on your site or provide some content.
Conversion of user IDs
As a result of user verification above, you receive user’s ID in Teddy. You can continue identifying the user with his ID in Teddy within your own system (this ID never changes for the same user). It is recommended to do just that if at the time of installation of the widget you do not have any legacy user base and Teddy is the only way of authentication.
In any other case, you probably want to manage your own user base with your own IDs of users. In this case, you have to convert the user’s ID in Teddy received in response to user verification request, to user ID in your system. To do this you can for example store the correspondence of the user ID in Teddy to his ID in your system in a table in your database.
However, Teddy can make this work for you and when you verify user ID, Teddy will also return user’s ID in your system - remote_id in the previous section.
In order to let Teddy know which user ID in your system corresponds to which user ID in Teddy, you should no later than 1 minute after successful authentication of any new (first-time) user make a POST call to Teddy URL https://www.teddyid.com/link_remote_id.php and pass the following
| node_id | Your node ID |
| token |
Token for authenticating your server to Teddy (see the description of
authentication using callbacks). Calculated as follows: sha1("from="+node_id+";to="+to_node_id+";"+secret_key), where to_node_id=1 is ID of node the request is sent to. |
| employee_id | ID of the authenticated user in Teddy |
| auth_token | Token received by function onAuth() |
| url | URL of the page the widget was loaded from |
| ip | IP address of the user. Teddy checks that it matches the address from which he opened the widget |
| remote_id | User ID in your system (no more than 40 characters) |
(The same parameters as for user verification, + remote_id).
The server's response is a JSON object. The values depend on the result of processing.
If the IDs were successfully linked, you will get the response:
{
	result: “ok”
}
In case of error you will get a response like
{
	result: “error”,
	error_code: “BAD_PARAMS”,
	error: “some params missing”
}
where
| result | error |
| error_code | Error code (a string), see below for the list of possible error codes |
| error | Error description |
The list of possible error codes:
| Error Code | Description of error |
|---|---|
| BAD_PARAMS | The request did not include all parameters |
| NODE_AUTH_FAILURE | Failed to authenticate your node |
| EMPLOYEE_ALREADY_LINKED | This Teddy user is already associated with another ID in your system |
| REMOTE_ID_ALREADY_LINKED | This ID in your system is already associated with another Teddy user |
| EMPLOYEE_AUTH_FAILURE | This user is not authenticated or authentication expired |
Typical situations when you use the service of linking Teddy user ID to user ID in your system:
-
It is user’s first login to your site through Teddy, it can be detected by the lack of remote_id field in the response. In this case, you generate a new user ID in your system and immediately call the linking service.
-
You want to enable existing users to log in to your site through Teddy in the future. To do this, after you authenticate the user via login and password or other authentication mechanism that you already use on your website, you offer the user to log in through Teddy too. After successful authentication through Teddy you know the user ID in your system and in Teddy and can link them.
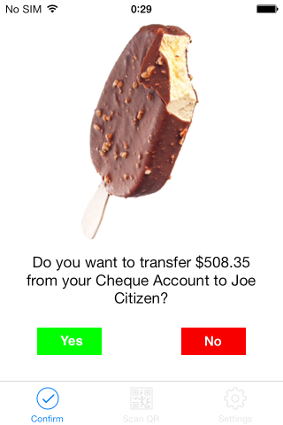
Authorization of actions
Teddy can be used not just for authentication (login) but for authorization of actions too. For example, if the user performs actions on your site that are sensitive in terms of security (money transfer, editing important data, other actions with serious consequences), you can prompt the user for additional confirmation of an action by sending the corresponding request to his phone.
Sending request
In order to request user confirmation to perform an action, you need to call Teddy URL https://www.teddyid.com/authorize.php and POST the following parameters:
| node_id | Your node ID |
| token |
Token for authenticating your server to Teddy (see the description of
authentication using callbacks). Calculated as follows: sha1("from="+node_id+";to="+to_node_id+";"+secret_key), where to_node_id=1 is ID of node the request is sent to. |
| employee_id или remote_id | User ID in Teddy (employee_id) or your system (remote_id) |
| question | The question you want to ask the user. It will passed to the phone verbatim. Max 300 characters. |
| callback_url | Optionally, URL on your server to receive the user's response |
Teddy Server responds to your request immediately, without waiting for a response from the user.
The server's response is a JSON object. Its contents depend on the result of processing.
In the case of the successful receiving of the request for processing, you get a response like this:
{
	result: “ok”,
	request_id: “123456”,
	auth_picture: “https://www.teddyid.com/images/auth_pictures/52.jpg”
}
where:
request_id is an identifier assigned by the request, you can use it later to query the status of the request or it will be passed in Teddy request to your callback_url.
auth_picture is URL of the picture you should display to the user. The same picture is sent to the user’s phone and the user needs to compare the pictures and tap “Yes” only if they match. This parameter may be missing if user’s app is not able to display pictures.
In case of error you will get response like
{
	result: “error”,
	error_code: “PARAMS”,
	error: “some params missing”
}
where
| result | error |
| error_code | Error code (a string), see below for the list of possible error codes |
| error_type |
Error type: fatal - fatal error: repeated request with the same parameters will result the same error, recoverable - recoverable error: you can repeat the same query later, and it can be completed successfully. |
| error | Error description |
The list of possible error codes:
| Error Code | Description of error |
|---|---|
| PARAMS | The request did not include all required parameters |
| AUTH | Failed to authenticate your node |
| BAD_REMOTE_ID | Transmitted remote_id not found |
| NOT_ENROLLED | This user has no phone paired to his account |
| FOREIGN_USER | The specified user never authenticated to any of your nodes during the last month. |
| NOT_SENT | Failed to send a request to the user's phone. This is the only error that can be recoverable |
If you are using our library then instead of programming requests, you can call just one method:
TapAuthorization::authorize();
Obtaining user response
Callback
If you passed callback_url in the request for authorization then immediately after receiving a response from the user Teddy will POST the following parameters to your callback_url:
| node_id | Teddy node ID, always 1. |
| token |
Token for authenticating your server to Teddy (see the description
of authentication using callbacks). Calculated as follows: sha1("from="+node_id+";to="+to_node_id+";"+secret_key), where to_node_id is ID of your node to which the request is being sent, secret_key is Teddy secret key. |
| request_id | Request ID, which you received in response to your authorization request |
| response |
User response: Y - yes, N - no. |
Your server must respond with JSON:
{
	result: “ok”
}
Any other response is regarded as an error processing the callback.
The call occurs only once immediately after the user's response. If you are not able to process the request and give the correct response within 30 seconds, the request will not be repeated.
If the user did not give any response on his phone (yes or no), then callback_url will never be called for this request.
Polling
You can also periodically poll Teddy while waiting for user’s response to authorization request.
To get user's response call Teddy URL https://www.teddyid.com/get_authorization_response.php and POST the following parameters:
| node_id | Your node ID |
| token |
Token for authenticating your server to Teddy (see the description
of authentication using callbacks). Calculated as follows: sha1("from="+node_id+";to="+to_node_id+";"+secret_key), where to_node_id=1 is ID of node the request is sent to. |
| request_id | Request ID, which you received in response to your authorization request |
The server's response is a JSON object. Its contents depend on the result of processing.
In the case of the successful processing of your polling request, you receive a response like this:
{
	result: “ok”,
	response: “Y”,
	response_date: “2014-01-21 16:59:22”
}
Here:
response - the user's response (Y, N or null if there is no response yet at the time of the polling request)
response_date - the date of the response, or null if no response.
You should poll the status of the authorization request until you get a response other than null, afterwards the status will not change.
In case of error you will get a response like
{
	result: “error”,
	error_code: “PARAMS”,
	error: “some params missing”
}
where
| result | error |
| error_code | Error code (a string), see below for the list of possible error codes |
| error | Error description |
List of possible error codes:
| Error Code | Description of error |
|---|---|
| PARAMS | The request does not include all required parameters |
| AUTH | Failed to authenticate your node |
| NO_REQUEST | Transmitted request_id not found |
If you are using our library and want to obtain authorization status then instead of programming requests, you can call just one method:
TapAuthorization::getAuthorizationResponse();
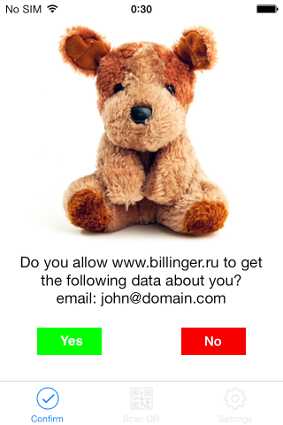
Authorization of sharing of personal data
Similar to requests for authorization of actions, you can ask users for permission to get their contact information stored in Teddy. The user will be prompted on his phone, and if he answers "Yes", his contact details will be passed to your server.
The scheme of work is exactly the same as when you authorize actions, the difference is only in data transmitted during queries. Below we indicate the only differences.
Sending request
Instead of question field, two other parameters are passed:
| domain | Domain of your site that wants to get contact details of the user. The user should at least once in the past be authenticated to your website via Teddy. |
| requested_fields |
List of fields of contact data that you want to receive. Fields are separated
by commas. The following fields are currently supported: email - the email address the user phone – user’s mobile phone. |
Additional error codes in the response:
| Error Code | Description of error |
|---|---|
| UNKNOWN_DOMAIN | Specified user never authenticated to this domain during the last month. |
| INVALID_FIELD | Invalid field of contact data |
| NO_FIELD | Requested field is not filled in the user profile |
If you are using our library then instead of programming requests, you can call just one method:
TapAuthorization::requestData();
Obtaining user response
Callback
While calling your callback_url in case response=Y we pass one additional parameter:
| field_values | Names and values of user contact data, JSON encoded |
Polling
In Teddy response in case response = Y there is an additional field in the JSON object:
| arrFieldValues | Names and values of user contact data |